Hi and welcome to my first post on my new {blogdown} website! This post will walk you through the setup of your very own personal website with wowchemy’s awesome Academic Theme and allow me to try out the functionalities of this new blogging workflow!
The what, the how and the why of blogdown?
The what and the why
{blogdown} is an R package that makes blogging for R users as straightforward as possible. While there is a little bit of an overhead in learning the structure of a site created with this package, it offers in my opinion the easiest way to share code-centric content on the web for non-web developers like me!
The how
The workflow of a {blogdown} website depicted below is almost all automatic and designed to run in the background. While you won’t have to worry about it on most days, it’s useful to take a quick look at how everything works to be able do diagnose the point of failure when an issue eventually arises. A blog post workflow can be described as follows. You’ll edit your code in R-Markdown within R-Studio, then knit that file which will execute the code chunks and render the content of your blog post into a Mardown document. Hugo, an open source website generator, will then render these elements into an HTML website you can preview locally while editing or push to a GitHub repository to deploy. In the last step of the workflow, Netlify deploys your website from your GitHub repository and publishes it. The awesome thing is that all of this happens automatically, which allows you to focus on the content of your website without having to deal with the hassle of deploying your website!
Prerequisites
Netlify, R-Studio, GitHub… If these names don’t sound familiar to you, this section is made for you! Here is a quick run down of what you need to get started:
- A GitHub account
- Git
- A Git GUI interface (I recommend Fork)
- A Netlify account
- Register with and link your GitHub Account
- R and R-Studio
- The extended version of Hugo
- The blogdown package
Once you have created all the required accounts and installed the required software you’re ready to progress to the next section!
NB: I found that the easiest way of installing Hugo was through a package manager such as Chocolatey for Windows or Homebrew for macOS or Linux. See the Hugo installation guide for more details.
The setup in 30 minutes
This section will walk you through the creation of your first {blogdown} site in less than 30 minutes!
Step 1: Set up a new GitHub repository
Go to GitHub and set up a new repository with a README.
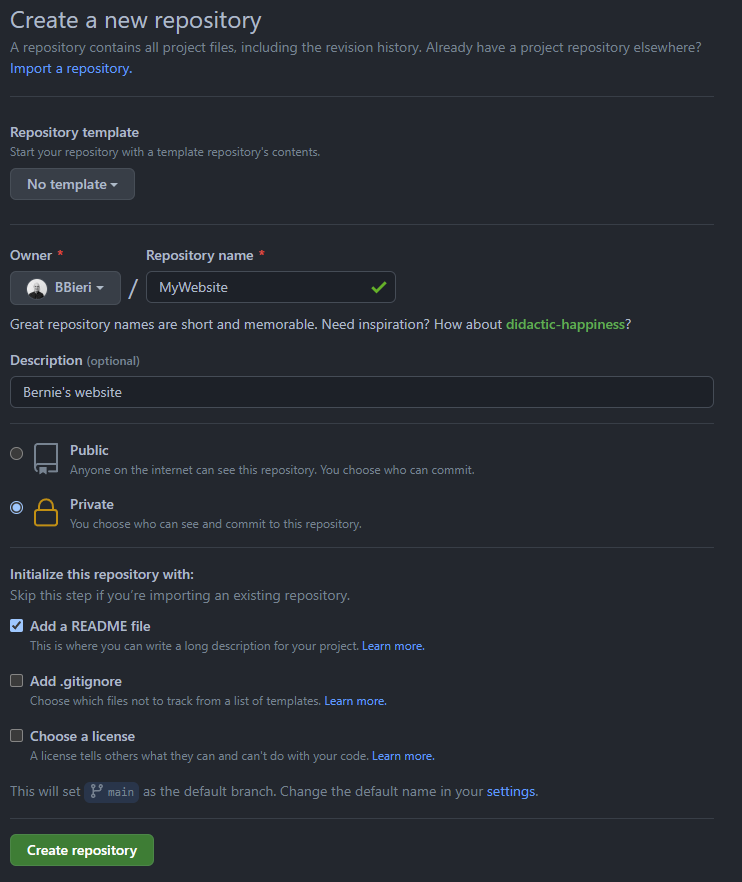
After creating your repository online, clone it by clicking on the clone button and copy-pasting the link to your Git GUI client (Fork if you followed the instructions above). This visual git interface will serve as an interface between the local version of your code (the one on your computer) and the remote one (the one on GitHub’s servers) via pull/push commands.
Create the project in R-Studio
After successfully cloning your repository to your local machine, open R and create a new project in the folder that you just created by cloning it. This will be the “root” folder of the project from now on.
Creating a new project from an existing direcotry is simply done by navigating to: File > New Project > Existing Directory in R-Studio and pointing to the folder you just created by cloning your GitHub repository.
Create your site and serve it locally
Creating your site is a one liner. Yes you read right, a one line command! Simply open up the project you just created and run the following line where you specify the theme you want to use (wowchemy’s Academic Theme in our case):
library(blogdown)
new_site(theme = "wowchemy/starter-academic")
This line will automatically create the structure of your new website and spit out some initial configuration messages. After you’ve read through them, simply run the following line to serve (read previewing in your browser while editing) your site locally:
blogdown::serve_site()This will leverage Hugo’s live reload functionality and provide your with a live version of your site in RStudio’s “Viewer” pane. You can easily open this in your browser by clicking on the “Open in new window” button in the viewer pane. Try editing a line in one of the posts in the content > post folder and see how live reload behaves when your save your edits in RStudio.
Now that you have created your site, take the time to scroll through it and check out the different widgets that make up your home page as they will be the building blocks of your site! Once this is done, stop the live server with {r} blogdown::stop_server() and run the following command:
file.edit(".gitignore") # Opens up the .gitignore fileAnd paste the following elements in this file before saving it:
.Rproj.user
.Rhistory
.RData
.Ruserdata
.DS_Store
Thumbs.db
This will make sure that git does not upload these files when you push to the remote version of your repository. After this is done, let’s check if everything works fine before pushing our changes to GitHub’s servers. {blogdown} has a function for this fortunately! Simply run:
blogdown::check_gitignore() # Checks gitignore
blogdown::check_content()   # Checks content
After taking care of any messages these functions may highlight. You can safely commit and push your changes to GitHub.
Deploy your site to Netlify
The final step to get your site online, after initializing your site in the previous step is to point Netlify to your GitHub repository. Head over to Netlify and log in with your GitHub account. Then, click on New site from Git, select the repository of your site and don’t change any of the site’s settings in the last pane. Finally, click on deploy to release your site.
Netlify will then deploy your site and allocate an automatically generated and often silly URL to it. Don’t worry, you can change it! Simply head over to the Domain settings on your site’s configuration page and buy or import a domain.
Congratulations! Your site is now online and visible to the world!
Cool! My site is online but what now?
The first thing you may want to do is to do a little shakedown of your site. Spend a little bit of time serving your site, browsing through the different widgets, and reading wowchemy’s excellent documentation . While you’re doing this, reflect on what the goal of your site is i.e. what you want to share and how. This will make the configuration process of your site that much easier!
To give you a rough idea on how to start, here was my configuration process:
- Opened the
configfolder and edited the basic configuration of the site. - Commented out the widgets I didn’t need in the
config/_menus_default/menus.yamlfile. - Edited the
.yamlfiles in thecontentfolder - Added my profile picture under
content\authors\admin\avatar.jpg - Added my PDF CV to
static/uploads - Added some icons to the
assets/media/icons/brandsfolder - Removed template blog posts
- Created this post by running
blogdown::new_post()
Customize your site further!
Want to go further? Change the color of this element or increase the font size of that piece of text? Here are some neat documentation sites, blogs and examples!
Sources
Reuse
Citation
For attribution, please cite this work as:
Bieri, Bernhard. 2021. “Quickstart Guide to Blogdown.”
November 13, 2021. https://bernhardbieri.ch/blog/2021-11-13-quickstart-guide-to-blogdown/.